Ten Link Strategy: 3 Hints to Spot Trap Pairs (Daily Challenge 10.8)
 Ten Link The JoyPlus Soft Planning Team
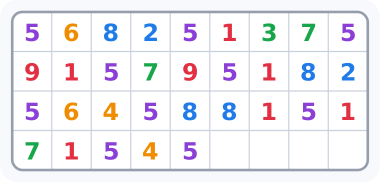
If you have read the beginner guide, you know the basics: two numbers of the same color always pair up, and pairs that sit side by side in reading order are safe. As the month goes on, Daily Challenge boards get bigger and the tempting pairs multiply. On boards from the second week (about 38 numbers), the first screen shows about 17 pairs you could clear, and about half of them are traps. Clearing at random finished only about 17% of these boards without adding numbers. Let's play the Daily Challenge for October 8, 2026 and learn to tell the two kinds apart.
Hint 1: Side by side in reading order is always safe
Picture the board as one line of text and write down only the colors, row after row. Every Ten Link board starts out built so that you can empty it just by removing two of the same color that sit next to each other in that line. And it does not matter in which order you remove such pairs: the line always shrinks to nothing in the end. That is why these pairs are always safe, and why at least one of them is always there until the board is empty, as long as you have not stepped into a trap.
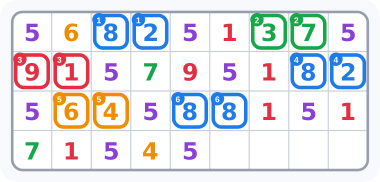
Hint 2: For a vertical or diagonal pair, clear what is between
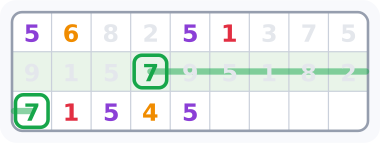
A vertical or diagonal pair jumps over all the numbers that lie between its two squares in reading order. So before you take one, look at those numbers and clear them in your head: remove any two of the same color that sit next to each other, again and again. If nothing is left, or just one number of the pair's own color, the pair is safe. If anything else is left, it is a trap.
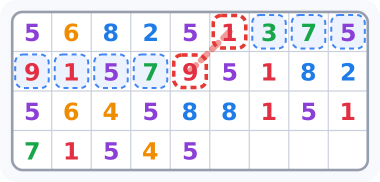
Clear them in your head. The 3 and 7 go, then the 9 and 1, and now the two 5s are next to each other and go too. One 7 is left. So this pair is a trap.
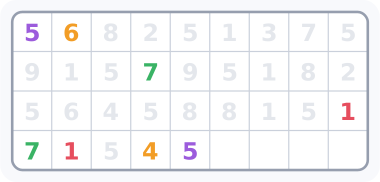
So leave the 1 and the 9 alone for now. As you will see below, each of them has its own partner much later in the game.
Hint 3: When everything between clears, take the shortcut
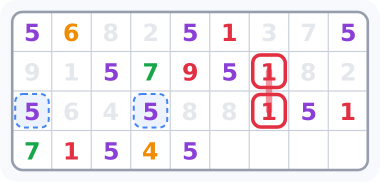
A safe vertical or diagonal pair is a shortcut. You do not have to take it, because reading order would bring the two together later anyway, but it saves time. The test is quick when only a few numbers sit between the two squares. When there are many, it is usually faster to keep clearing in reading order.
The rest: across cleared squares
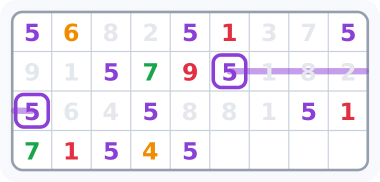
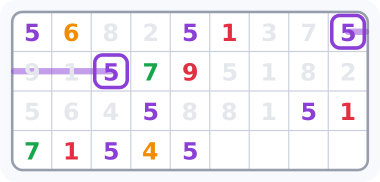
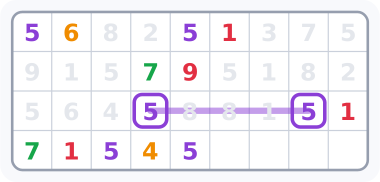
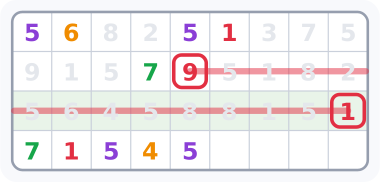
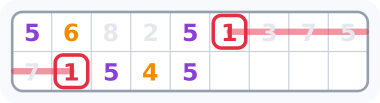
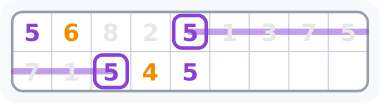
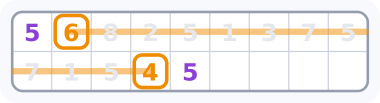
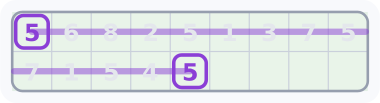
Look at moves 11 and 13. The 1 and 9 that seemed like such an easy pair on the first screen each had a partner of its own. Clearing them together right away would have ruined both.
Habits for bigger boards
- Clear the pairs that sit side by side in reading order first. They are always safe.
- Before a vertical or diagonal pair, clear the numbers between them in your head.
- Anything left besides one number of the pair's own color? Leave that pair alone.
- Use the test when the gap is short. Long gaps are slow to check, so keep going in reading order instead.
- After every pair, look around the new gap. The next pair is usually right there.
Next guide
Guides for other puzzles